
Are you tired of looking at a dull and worn-out garage floor? It’s time to give your space a much-needed makeover.
In this step-by-step guide, we’ll show you how to install a garage floor covering that will not only protect your floor but also give it a stylish and polished look. From preparing the floor to measuring and cutting the covering, we’ve got you covered.
Get ready to transform your garage into a functional and visually appealing space.
Preparing the Garage Floor
Now, you’ll want to start by clearing the garage floor of any debris or obstacles. First, grab a broom and sweep away any loose dirt, leaves, or small objects that may be scattered across the floor. Be sure to pay attention to corners and edges, where debris accumulates. Next, use a shop vacuum to remove any dust or dirt the broom may have missed. This will ensure the floor is clean and ready for the next step.
After you have cleared the floor of debris, take a close look for any cracks or uneven areas. If you spot any cracks, fill them with a concrete patching compound and allow it to dry completely. You may need to level the floor using a self-leveling compound for uneven areas. Follow the manufacturer’s instructions carefully to ensure proper application.
Once the floor is clean and necessary repairs have been made, it’s time to wash it well. Mix a floor degreaser with water according to the instructions, and use a mop or scrub brush to scrub the entire surface. This will remove any grease or oil stains that may be present and ensure that the floor is ready to be covered.
Choosing the Right Garage Floor Covering
When choosing the right option for your garage floor, consider factors such as durability, ease of maintenance, and overall aesthetic appeal.
You want a floor covering that can withstand the wear and tear of cars, tools, and other heavy equipment. Look for epoxy or polyurethane coatings known for their durability and resistance to staining, chemicals, and abrasions. These options provide a strong and long-lasting surface that can handle the demands of a garage environment.
In terms of maintenance, you’ll want a floor covering that is easy to clean and maintain. Choose a material that is easily swept or hosed down to remove dirt, dust, and spills. Avoid materials that require special cleaning solutions or extensive maintenance routines.
Cleaning and Clearing the Garage Space
Clearing and tidying the garage space can help create a more organized and functional area. Start by removing any items that are no longer needed or used. Sort your belongings and decide what to keep, donate, or throw away. This will help create more space and make it easier to move around.
Once you’ve decluttered, give the garage a good cleaning. Sweep the floors, removing any dirt, dust, and debris. Use a mop or pressure washer to clean the floors thoroughly. This will make the space look better and help prepare it for installing a garage floor covering.
Next, organize your belongings. Invest in storage solutions such as shelves, cabinets, or pegboards to maximize the use of vertical space. Use clear bins or labels to identify and find items easily. This will make it easier to maintain a clean and organized garage.
Measuring and Cutting the Garage Floor Covering
Gather the necessary tools and materials to measure and cut the garage floor covering. You’ll need a measuring tape, a utility knife, a straight edge, and the garage floor covering itself. Ensure you have enough covering to cover the entire garage floor.
First, measure the dimensions of your garage floor using the measuring tape. Start from one corner and measure the length and width of the floor. Be sure to measure any nooks or corners separately, as these areas may require additional cutting.
Next, mark the garage floor covering with a pencil or marker using your measurements. Use the straight edge to create straight lines for cutting. Ensure the lines are accurate and aligned with the dimensions of the garage floor.
Now it’s time to cut the garage floor covering. Take the utility knife and carefully follow the marked lines. Cut slowly and steadily to ensure clean and precise cuts. Remember to take breaks if needed to avoid any mistakes or accidents.
Once you’ve cut the garage floor covering, carefully place it on the floor. Smooth out any wrinkles or bubbles, and make sure it fits snugly. Trim any excess covering if necessary.
Congratulations! You’ve successfully measured and cut the garage floor covering. Now, you can install the covering and transform your garage space.
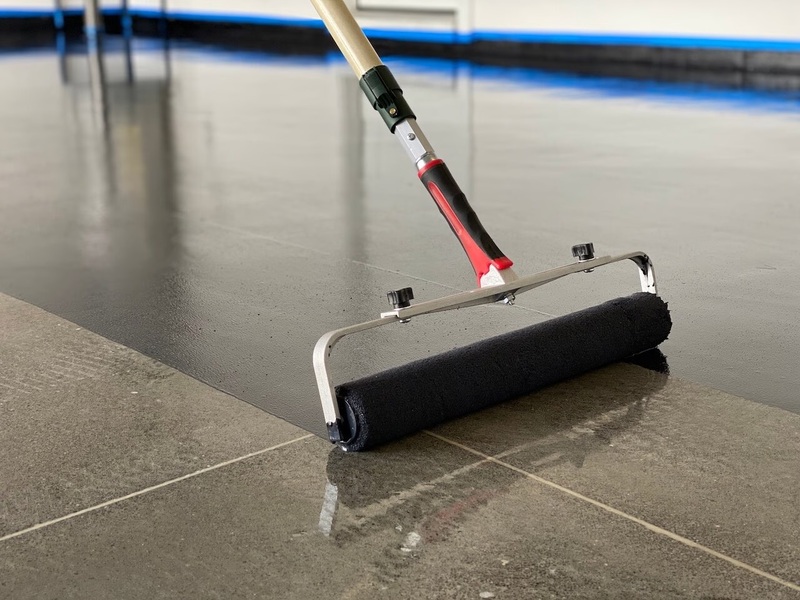
Installing the Garage Floor Covering
Now that you’ve measured and cut the garage floor covering, it’s time to start laying it down.
Begin by cleaning the garage floor thoroughly to ensure a smooth and even surface for installation. Sweep away debris, and use a mild detergent to remove dirt or stains.
Once the floor is clean and dry, start in one corner and roll out the floor covering, ensuring it aligns with the edges of the garage. Smooth any wrinkles or bubbles as you go along, using a roller or a broom to press firmly into place.
If your floor covering has adhesive backing, remove the protective film and carefully press it down onto the floor, smoothing it out. If your floor covering requires adhesive, apply it according to the manufacturer’s instructions, using a trowel to spread it evenly over the floor. Press the floor covering into the adhesive, making sure it adheres securely.
Continue laying the floor covering in sections until the entire garage floor is covered. Trim any excess material with a utility knife.
Finishing Touches and Maintenance Tips
Once you’ve completed the installation process, regularly sweep and mop the floor covering to keep it clean and in good condition. Maintaining the cleanliness of your garage floor covering is essential to prolong its lifespan and ensure its durability.
Sweeping the floor covering will help remove any loose dirt, debris, or dust that may have accumulated. This simple step will prevent these particles from scratching or damaging the surface of the floor covering.
In addition to sweeping, it is important to mop the floor covering periodically. Mopping will help remove any stubborn stains or spills that may have occurred. Use a mild detergent or cleaner specifically designed for the type of floor covering you have installed. Avoid using harsh chemicals or abrasive cleaners, as they can damage the floor covering.
In conclusion, installing a garage floor covering is a straightforward process that can greatly enhance the look and functionality of your garage space. By following the step-by-step guide, you can ensure a successful installation.
Remember to prepare the floor, choose the right covering, clean and clear the space, measure and cut accurately, and install the covering. Don’t forget to add finishing touches and follow maintenance tips for long-lasting results. Enjoy your newly transformed garage!
Key Takeaways:
- Clear and prepare the garage floor of debris, dust, and cracks.
- Consider durability, maintenance, and aesthetics when choosing floor covering.
- Epoxy and polyurethane coatings are durable and resistant choices.
- Clear out and organize the garage space before installation.
- Measure and cut the garage floor covering accurately for a precise fit.
- Clean the floor thoroughly before laying the floor covering.
- Adhere the floor covering to the garage floor, ensuring a smooth fit.
- Regular maintenance, like sweeping and mopping, prolongs the floor covering’s lifespan.
Recent Comments