
Many homeowners are highlighting epoxy flooring as DIY home improvement projects continue to soar in popularity. Durable, attractive, and highly customizable, epoxy is a versatile material with many applications in various sectors.
However, it’s essential to understand that installing an epoxy floor is not as simple as pouring a can of paint. This article provides insights into the time it takes to install an epoxy floor and an overview of the epoxy installation process.
What is Epoxy?
Epoxy is a thermosetting resin that is applied as a coating. It’s made up of two main components: resins and hardeners. When these two elements combine, they form a rigid, plastic-like substance that bonds extremely well to substrates and resists degradation. This makes it an excellent option for flooring in spaces that require high durability, such as garages, industrial settings, and commercial premises.
Factors Affecting the Installation Time
The installation of epoxy flooring is a multi-stage process that requires precision and patience. The duration it takes to complete this task can vary significantly based on several factors:
Floor Preparation
Before applying the epoxy, the floor must be thoroughly prepared, which is one of the most time-consuming stages of the process. This can involve cleaning, repairing any damages, removing any existing coatings or paint, and ensuring the floor is entirely level. Depending on the floor’s condition and size, this process could take anywhere from a few hours to a couple of days.
Climate and Humidity
The curing time for epoxy can be significantly impacted by environmental conditions such as temperature and humidity. Epoxy tends to cure faster in warmer temperatures and slower in colder ones. Excessive humidity can also interfere with the curing process and potentially damage the finish.
Type of Epoxy
There are different epoxy types, each with a distinct curing time. Standard two-part epoxy usually takes longer to cure than one-part epoxy or ‘epoxy fortifiers.’
The Epoxy Installation Process
The installation of epoxy flooring can be broken down into four main steps: preparing the floor, priming, applying the epoxy, and curing.
Preparing the Floor
As previously mentioned, preparation is an integral part of the process. The floor must be clean, dry, and free of any oil, grease, or dust. This may involve scrubbing with a degreaser, patching any holes or cracks, and sanding or grinding the floor to create a suitable surface for the epoxy to bond with.
Priming
Priming is crucial, especially for porous surfaces, as it helps the epoxy bond better with the floor. The primer is usually a thinner version of epoxy that penetrates into the pores of the concrete, creating an optimal bonding surface. This step typically requires a few hours for application and drying.
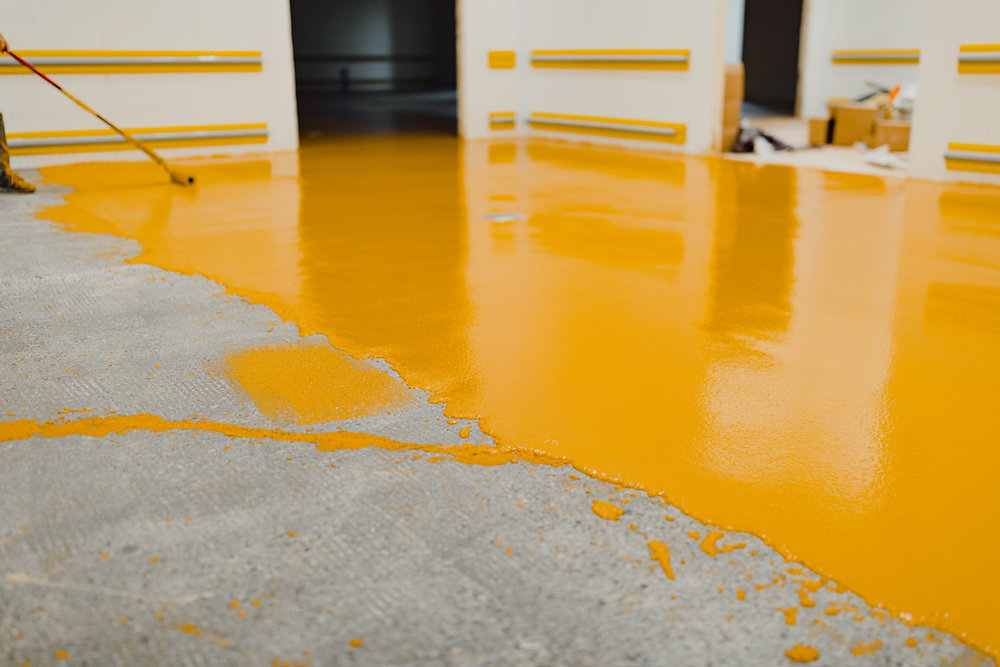
Applying the Epoxy
Once the primer has dried, it’s time to apply the epoxy. This involves mixing the epoxy resin with the hardener and applying the mixture to the floor using a roller or squeegee. Depending on the size of the floor, this could take several hours.
Curing
After applying the epoxy, it needs to cure or harden. This can take anywhere from several hours to a few days, depending on the type of epoxy used and the environmental conditions.
Timeframe for Epoxy Floor Installation
Considering all these factors, you can expect the entire process of epoxy flooring installation to take anywhere from two to five days for a standard residential garage. This includes:
Floor preparation: 1-2 days
Priming: A few hours to a day
Applying the epoxy: Several hours to a day
Curing: 1-2 days
Remember, these are estimates, and the exact time may vary. It’s essential to allow each step of the process the necessary time to ensure a successful, durable finish. Rushing the process can lead to a poor bond between the epoxy and the floor, resulting in peeling, cracking, or other issues over time.
Epoxy flooring installation is a meticulous process that requires patience, precision, and the right conditions. Although it may take a few days to complete, the result is a highly durable, attractive, and long-lasting floor. Remember, a successful installation is not about how fast you can get the job done but about the quality of the work. Therefore, take your time, prepare well, and allow each process stage the necessary time to yield the best results.
Key Takeaways
- The time it takes to install an epoxy floor can vary significantly, usually two to five days, depending on factors like the floor’s condition, climate, and the type of epoxy used.
- Floor preparation is a critical stage that involves cleaning, repairing damages, removing existing coatings or paints, and leveling the floor. This stage can take from a few hours to a couple of days.
- The epoxy installation involves four main steps: preparing the floor, priming, applying the epoxy, and curing. Each step requires adequate time for a successful installation.
- Environmental conditions like temperature and humidity significantly affect the curing time of epoxy. Warmer temperatures speed up the process, while colder ones slow it down. Excessive moisture can negatively impact the finish.
- The type of epoxy used also plays a role in the curing time. Standard two-part epoxy usually takes longer to cure than one-part epoxy.
- Priming is essential to ensure a strong bond between the epoxy and the floor, particularly for porous surfaces.
- The quality of epoxy flooring installation relies more on the work quality than on the completion speed. Rushing the process could lead to issues like peeling and cracking over time.
Recent Comments